A clogged kitchen sink can be a real headache. It’s inconvenient and disrupts daily chores.
Knowing simple DIY home repairs for clogged kitchen sink can save time and money. Taking matters into your own hands often feels satisfying. Fixing a clogged kitchen sink might seem daunting, but many methods are straightforward. This guide will help you tackle the problem with ease.
From common household items to basic tools, you’ll learn effective DIY home repairs for clogged kitchen sink. No need for expensive plumbers or complicated solutions. Whether it’s food scraps, grease, or soap buildup, these DIY tips will help restore your sink’s function quickly.
Let’s dive into the practical steps for unclogging your kitchen sink and keeping it flowing smoothly.
Common Causes
Is your kitchen sink draining slower than a snail on a lazy afternoon? We’ve all been there. A clogged sink can be a real headache, but understanding the common causes can help you prevent it from happening again.
Let’s dive into the usual suspects that might be causing your kitchen sink to misbehave.
Food Residue
One of the biggest culprits behind a clogged kitchen sink is food residue. It’s easy to rinse off plates without realizing the tiny bits of food that sneak down the drain. Over time, these food particles can build up and block the pipes, leading to the need for DIY home repairs for clogged kitchen sink.
- Starchy Foods: Think about potatoes and pasta. These foods can become sticky and create a paste-like clog.
- Fibrous Vegetables: Celery, asparagus, and other stringy veggies can wrap around the insides of your pipes.
- Eggshells: These might seem harmless, but they can get stuck and create a stubborn clog.
Quick tip: Always scrape food scraps into the trash or compost bin before rinsing your dishes. It might feel like an extra step, but it saves a lot of hassle down the road.
Grease Buildup
Another common cause of clogged kitchen sinks is grease buildup. Pouring cooking oils and fats down the drain is a no-no. While they may be liquid when hot, they solidify as they cool, creating a greasy blockage that can be hard to remove. DIY home repairs for clogged kitchen sink can help tackle this issue effectively.
- Cooking Oils: Olive oil, vegetable oil, and other cooking oils can coat the pipes.
- Animal Fats: Bacon grease and other animal fats solidify quickly.
- Butter and Margarine: These also contribute to grease clogs.
Here’s a little trick: pour grease into a container and let it cool before throwing it away. It’s a small habit that can save you a big headache later.
Addressing these common causes head-on can keep your kitchen sink flowing smoothly. Next time, you’ll be well-armed to tackle or prevent those pesky clogs!
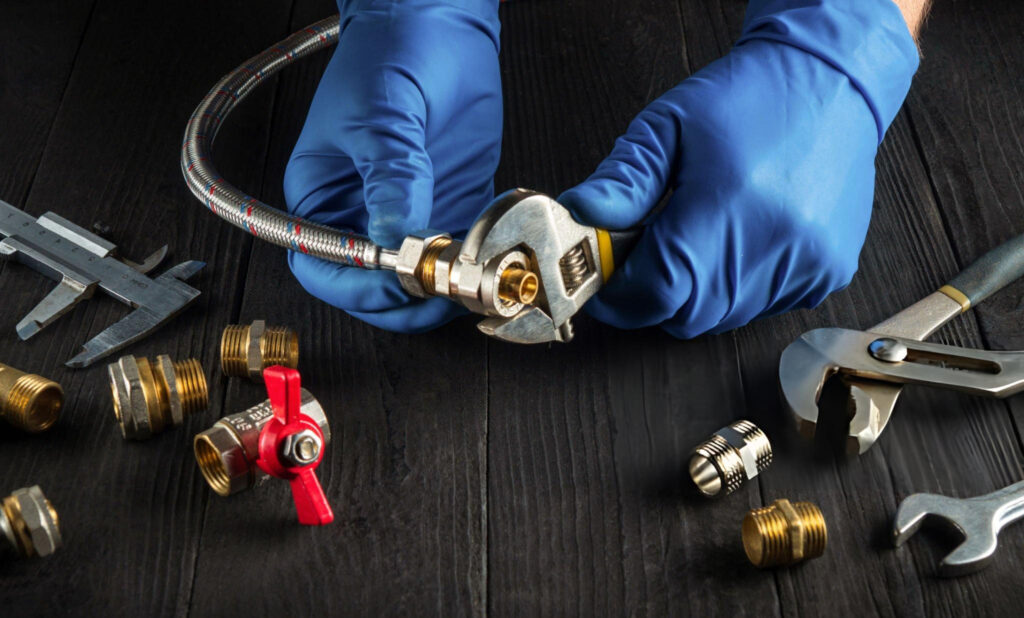
Essential Tools
When it comes to DIY home repairs for clogged kitchen sink, having the right tools can make all the difference. Without the proper equipment, you might find yourself knee-deep in water and frustration
Here, we’ll discuss two must-have tools for tackling this common household problem. Let’s dive in!
Plunger
A plunger is a trusty sidekick for many household clogs. It’s simple, effective, and often the first tool you should reach for. There are a few key points to remember when using a plunger:
- Seal the Drain: Ensure you create a tight seal around the drain. This helps generate the necessary pressure.
- Use Water: Fill the sink with enough water to cover the plunger. This helps in building pressure.
- Plunge Vigorously: Push and pull the plunger with force. The goal is to dislodge the clog by creating a vacuum effect.
I remember the first time I used a plunger for DIY home repairs for clogged kitchen sink. It felt like a mini workout! But the satisfaction of seeing the water finally drain was worth every push and pull.
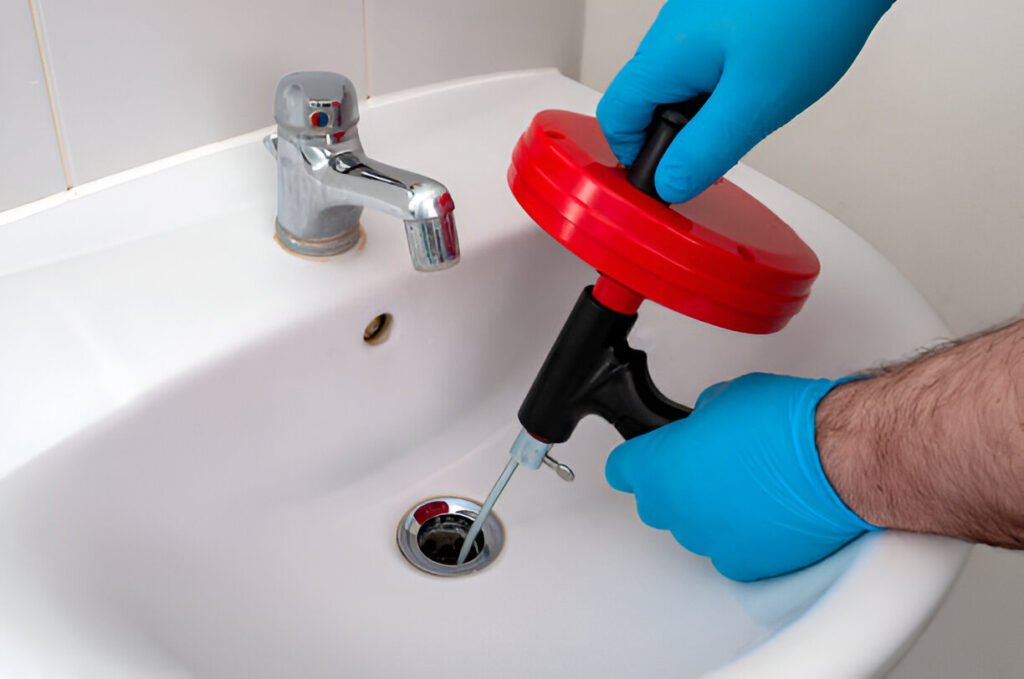
Drain Snake
If the plunger doesn’t do the trick, it’s time to bring out the big guns: the drain snake. This tool is perfect for stubborn clogs that are deeper in the pipes. Here’s how to use it:
- Insert the Snake: Push the snake into the drain until you feel resistance.
- Crank the Handle: Turn the handle to break up the clog. This might take some effort, so be patient.
- Pull Out the Clog: Once you feel the clog loosening, pull the snake out slowly, bringing the debris with it.
Using a drain snake can feel a bit like fishing. You never know what you might pull out! But it’s a reliable method for those tricky clogs that just won’t budge.
With these essential tools for DIY home repairs for clogged kitchen sink, you’ll be ready to tackle most kitchen sink clogs with ease. A little effort and the right tools can save you the hassle of calling in professionals. Happy unclogging!
Safety Precautions
Getting your hands dirty with a clogged kitchen sink can be both rewarding and cost-effective. However, it’s essential to prioritize safety to avoid accidents and injuries.
Here, we’ll cover two crucial safety precautions: protective gear and proper ventilation. Let’s dive in!
Protective Gear
When tackling a clogged kitchen sink, wearing the right protective gear is paramount. You don’t want to end up with cuts, bruises, or worse. Here’s a list of items you should consider:
- Gloves: A sturdy pair of rubber gloves will protect your hands from sharp objects and harsh chemicals.
- Goggles: Safety goggles shield your eyes from splashes and debris. Remember, chemicals can be unpredictable!
- Apron: Wearing an apron can prevent your clothes from getting ruined by dirt and grime.
Not having these items handy? Think of it like heading into battle without armor. You wouldn’t do that, right?
Ventilation
Ever noticed how some cleaning solutions have a strong, unpleasant smell? That’s because they contain chemicals that can be harmful if inhaled in large quantities. Ensuring proper ventilation is key to maintaining a safe environment:
- Open Windows: Before starting, open the windows to let fresh air circulate. This helps reduce the concentration of fumes.
- Use Fans: A portable fan can help direct airflow and keep the area well-ventilated.
- Exhaust Fans: If your kitchen has an exhaust fan, switch it on to remove any lingering odors quickly.
Ignoring ventilation is like cooking without a smoke alarm. You might not notice the danger until it’s too late.
By following these safety precautions for DIY home repairs for clogged kitchen sink, you can tackle your clogged kitchen sink with confidence, ensuring both your repair success and personal well-being. Remember, safety first!

Plunger Method
If you’ve ever dealt with a clogged kitchen sink, you know how frustrating it can be. But before you call a plumber, consider DIY home repairs for clogged kitchen sink!
The plunger method is a simple, cost-effective solution. With a little preparation and the right technique, you can get your sink flowing smoothly again in no time.
Preparation
Before you begin, make sure you have the necessary tools and materials on hand. Here’s what you’ll need:
- Plunger – A standard cup plunger will do the trick.
- Rubber gloves – To keep your hands clean.
- Bucket – For any excess water or debris.
- Old towels – To clean up any spills.
Once you’ve gathered your supplies, follow these simple steps to ensure you’re ready to plunge:
- Clear the area around the sink to avoid any accidents.
- Remove any standing water with a bucket or a cup.
- Seal off the overflow hole with a damp cloth or tape to create a vacuum.
Step-by-step Process
Now that you’re prepared, it’s time to get to work. Follow these steps to unclog your kitchen sink using the plunger method:
- Fill the sink: Add a few inches of water to the sink. This helps create a seal and provides the necessary pressure to dislodge the clog.
- Position the plunger: Place the plunger over the drain, ensuring it covers the entire opening.
- Plunge: Push the plunger down and pull up with force. Repeat this motion several times, making sure to maintain a tight seal.
- Check for drainage: After a few plunges, remove the plunger and see if the water drains. If it doesn’t, repeat the process.
- Clean up: Once the clog is cleared, clean the area and dispose of any debris properly.
It’s as simple as that! With a little elbow grease and patience, you can have your kitchen sink back to normal in no time. Just remember, persistence is key. Sometimes it takes a few tries to get the job done.
And there you have it – the plunger method for DIY home repairs for clogged kitchen sink! It’s an easy and effective way to handle a clogged kitchen sink without breaking the bank. So next time you face this pesky problem, grab your plunger and tackle it head-on. You’ve got this!
Drain Snake Technique
Have you ever faced the frustration of a clogged kitchen sink? It’s one of those annoying household issues that can disrupt your entire day. But fear not! With the right tool and a bit of patience, you can tackle this problem yourself with DIY home repairs for clogged kitchen sink.
The drain snake, or plumber’s snake, is a handy device that can help you clear out those stubborn clogs in no time.
Let’s dive into how you can use a drain snake effectively.
Choosing A Snake
First things first, you need to select the right drain snake for the job. They come in various sizes and types, so making the right choice is crucial.
- Manual Drain Snake: Ideal for minor clogs. It’s inexpensive and easy to use.
- Motorized Drain Snake: Best for heavy-duty clogs. It’s more powerful but a bit pricier.
For most kitchen sinks, a manual drain snake should suffice. They’re typically around 25 feet long, which is more than enough to reach the clog.
Usage Instructions
Using a drain snake might seem daunting, but it’s simpler than you think. Here’s a step-by-step guide to help you out:
- Prepare Your Area: Place a bucket under the sink to catch any water or debris that might come out.
- Insert the Snake: Slowly push the snake into the drain until you feel resistance. This resistance is the clog.
- Rotate and Push: Gently rotate the handle of the snake while pushing it forward. This action helps the snake to latch onto the clog.
- Break the Clog: Once you feel the snake has grabbed the clog, pull it out slowly. Be prepared for some gunk!
- Flush the Drain: Run hot water down the drain for a few minutes to ensure everything is cleared out.
Remember, patience is key! It might take a couple of tries to fully remove the clog.
And there you have it! With these simple steps, you can take control of your kitchen sink and say goodbye to those pesky clogs. Happy snaking!
Natural Solutions
When it comes to unclogging your kitchen sink, there are plenty of chemical drain cleaners available. But did you know that you can achieve the same results with natural solutions? Not only are they safer for your pipes and the environment, but they’re also easy on the wallet.
Let’s explore two effective methods: using baking soda and vinegar, and boiling water.
Baking Soda And Vinegar
Remember that science experiment you did in school where you made a volcano erupt with baking soda and vinegar? Well, it’s time to put that knowledge to practical use! This dynamic duo is fantastic for tackling a clogged kitchen sink.
Here’s what you need to do:
- Remove any standing water from the sink.
- Pour about a cup of baking soda directly into the drain. You might need to push it down a bit with a spoon.
- Follow with a cup of vinegar. Be ready for some fizzing and bubbling – that’s the natural reaction doing its magic!
- Cover the drain with a plug or a cloth to keep the reaction concentrated in the pipes. Let it sit for about 15 minutes.
- Finally, flush the drain with hot water to clear out any remaining debris.
This method is not only effective but also gives you a little science show right in your kitchen. It’s a win-win!
Boiling Water
If you’re looking for a solution that’s as simple as pie, boiling water is your go-to. It’s amazing how something as basic as hot water can be so effective at clearing minor clogs.
Here’s the step-by-step:
- Boil a kettle or a pot of water.
- Carefully pour the boiling water directly into the drain in two to three stages. This allows the hot water to work its way through the clog, breaking it up.
- Wait a few minutes between each pour to let the hot water do its work.
Boiling water is especially good for clearing grease clogs as it melts the fat and washes it away. Just be sure your pipes can handle the heat!
By using these natural solutions for DIY home repairs for clogged kitchen sink, you can keep your kitchen sink flowing smoothly without resorting to harsh chemicals. Plus, it’s always satisfying to solve a problem with everyday items you already have at home.
So, next time your sink gets clogged, remember: you’ve got this!
Preventive Measures
Preventing a clogged kitchen sink can save you time and frustration. Taking simple steps can keep your sink in top condition. Let’s explore some effective preventive measures.
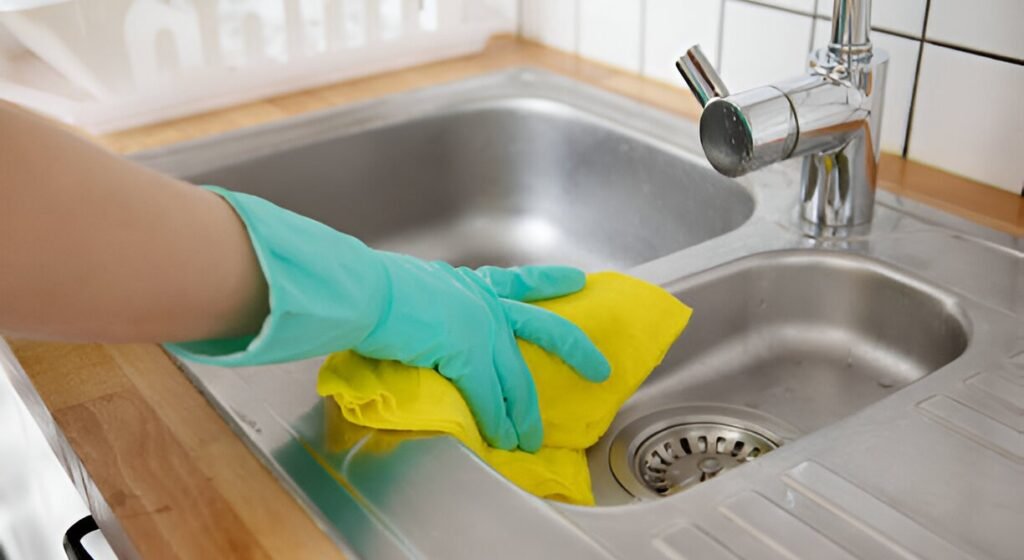
Regular Cleaning
Clean your sink regularly to avoid buildup. Use a mild soap and warm water. Scrub the sink and rinse thoroughly. This simple routine helps keep the pipes clear.
Pour a mixture of hot water and vinegar down the drain weekly. This combination breaks down minor clogs and keeps the sink fresh. You can also use baking soda with vinegar for a deeper clean.
Avoiding Grease Disposal
Never pour grease down the sink. Grease solidifies and causes blockages. Instead, let the grease cool and dispose of it in the trash.
Use a grease container to collect used cooking oil. This prevents it from going down the drain. Wipe greasy pans with a paper towel before washing them. This small step can prevent big problems.
When To Call A Professional
When it comes to DIY home repairs, fixing a clogged kitchen sink might seem like a straightforward task. However, there are certain situations where calling in a professional is the best course of action. Knowing when to seek expert help can save you time, money, and a lot of frustration. Let’s delve into some of these scenarios.
Persistent Clogs
Have you ever found yourself dealing with a clog that just won’t budge, no matter how many times you attack it with a plunger or a drain snake? Persistent clogs can be a real headache. If you find that your sink is frequently clogged or drains very slowly, it could be a sign of a deeper issue within your plumbing system.
Here are a few reasons why you might experience persistent clogs:
- Grease buildup: Over time, grease from food can accumulate in your pipes, creating a stubborn blockage.
- Foreign objects: Small items like food scraps, soap residue, or even jewelry can get stuck in the pipes.
- Tree roots: Believe it or not, tree roots can infiltrate your sewer lines, causing significant blockages.
When you encounter these issues, it’s often best to call a professional plumber. They have the tools and expertise to properly diagnose and fix the problem, ensuring your sink drains smoothly once again.
Pipe Damage
Another critical situation where you should consider professional help is when there’s evidence of pipe damage during DIY home repairs for clogged kitchen sink. You might notice leaks, unusual noises, or even visible cracks in the pipes under your sink. These are red flags that should not be ignored.
Pipe damage can be caused by:
- Corrosion: Over time, pipes can corrode, especially if your home has older plumbing.
- Wear and tear: Regular use and pressure can weaken pipes, leading to damage.
- Improper installation: If the plumbing was not installed correctly, it might lead to issues down the line.
Attempting to repair damaged pipes on your own can be risky. You might end up causing more harm than good. Professional plumbers have the skills and equipment to repair or replace damaged pipes efficiently and safely.
In conclusion, while DIY home repairs for clogged kitchen sink can be both satisfying and cost-effective, it’s important to know when to call in a professional. Persistent clogs and pipe damage are signs that expert help is needed. So, the next time you face a tough clog or suspect pipe issues, don’t hesitate to contact a trusted plumber. Sometimes, it’s just better to leave it to the pros!
Frequently Asked Questions
What Is The Best Home Remedy To Unclog A Kitchen Sink?
Use a mixture of baking soda and vinegar. Pour half a cup of baking soda, then one cup of vinegar. Let it sit for 15 minutes, then flush with hot water.
How To Quickly Unblock A Kitchen Sink?
Pour boiling water into the sink. Use a plunger to dislodge debris. Mix baking soda and vinegar, then pour it down the drain. Rinse with hot water.
What To Pour Down A Sink To Unblock It?
Pour boiling water mixed with baking soda and vinegar down the sink. Use a plunger or a plumber’s snake if necessary.
What Is The Best Homemade Drain Unclogger?
The best homemade drain unclogger is a mixture of baking soda and vinegar. Pour 1/2 cup baking soda followed by 1/2 cup vinegar into the drain. Wait 15 minutes, then flush with hot water.
Conclusion
Fixing a clogged kitchen sink can be straightforward with DIY methods. With simple tools and steps, you can save time and money. Remember to stay patient and persistent during the process. Regular maintenance prevents future clogs. Always dispose of grease and food scraps properly.
DIY home repairs for clogged kitchen sink boost confidence and keep your kitchen running smoothly. Enjoy a clog-free sink and the sense of accomplishment from doing it yourself. Happy repairing!