Low water pressure can be frustrating. Plumbing repair tips for low water pressure can help resolve the issue, making simple tasks like showering hassle-free.
Understanding how to fix it can save time and stress. Low water pressure can stem from various issues in your plumbing system.
It might be due to clogged pipes, faulty fixtures, or problems with the main water line. Knowing the root cause is essential to address it effectively.
In this blog, we will explore practical plumbing repair tips for low water pressure to help restore your water flow. We’ll cover common causes and solutions that are easy to implement. Whether you’re a homeowner or a renter, these tips will guide you in fixing low water pressure. With a little effort, you can enjoy a steady flow and improve your daily routines.
Let’s dive into these helpful plumbing repair tips for low water pressure.

Credit: www.reddit.com
Causes Of Low Water Pressure
Low water pressure can be a frustrating issue in any home. Understanding the causes can help you fix the problem. Let’s explore some common and hidden issues that might be affecting your water pressure.
Common Issues
Common causes of low water pressure are easy to spot. Clogged pipes can restrict water flow. Mineral build-up and debris are usual culprits. Old pipes can also corrode over time. This corrosion reduces the diameter of the pipes, leading to lower pressure.
Plumbing repair tips for low water pressure often start with checking your faucets for aerator problems. A clogged aerator can decrease water flow.
Hidden Problems
Some issues are not visible but still affect water pressure. Leaky pipes can be a major problem. Even small leaks reduce overall pressure. Hidden leaks in walls or under floors are hard to find. Another hidden issue can be a problem with the pressure regulator.
A faulty regulator can lead to inconsistent water pressure. Lastly, look out for issues with the main water supply line. A problem here can affect the whole house.

Credit: www.robinsplumbing.com
Identifying The Problem
Low water pressure can be a real headache. Imagine trying to take a shower, and the water dribbles out like a leaky faucet. Yikes! Before you call a plumber, it’s wise to know what’s causing the issue. Identifying the problem is the first step in plumbing repair tips for low water pressure.
Let’s break it down.
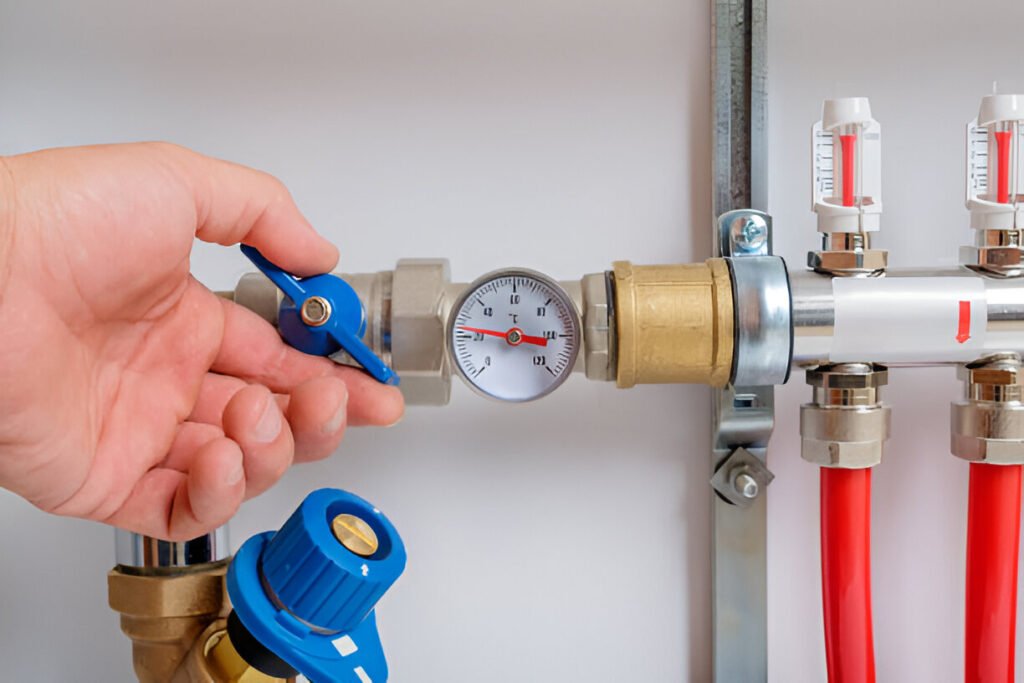
Test Your Pressure
First things first, you need to know what you’re dealing with. Testing your water pressure is simple and straightforward. Here’s how you can do it:
- Get a water pressure gauge. You can find these at any hardware store.
- Attach the gauge to an outside faucet. Make sure the faucet is off before attaching the gauge.
- Turn the faucet on full blast and read the gauge. Ideally, your pressure should be between 40-60 psi (pounds per square inch).
If the reading is lower than 40 psi, you’ve got low water pressure. Now, let’s dig deeper to find out why.
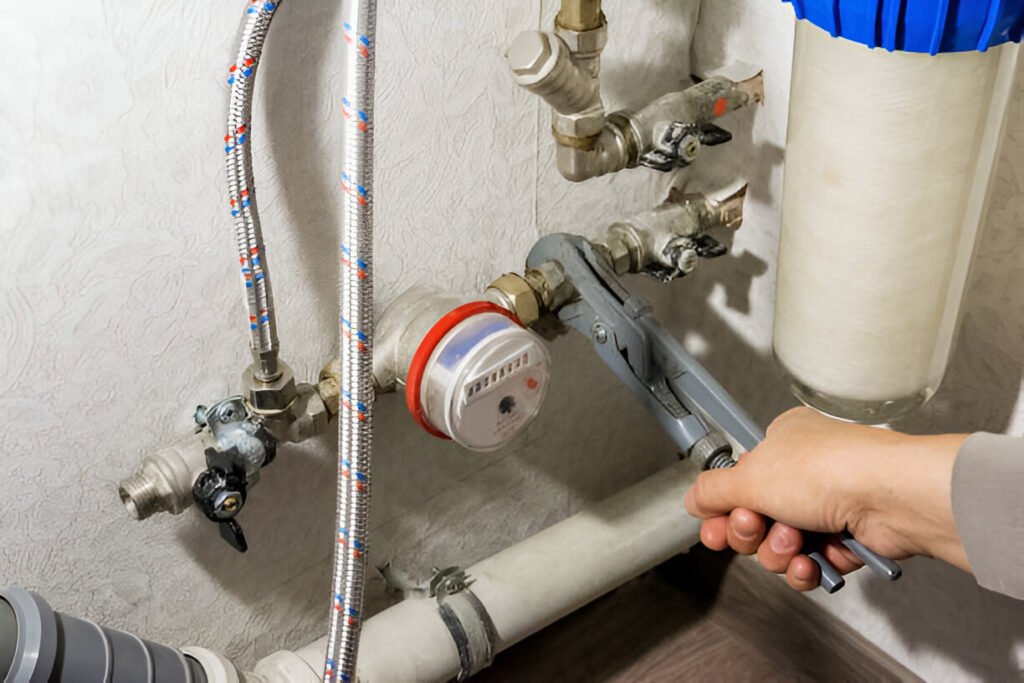
Inspect Pipes
Pipes are like the veins of your plumbing system. If they’re clogged or corroded, water can’t flow freely. Here’s what you can do:
- Check for Leaks: Look for any visible leaks. Leaks can significantly reduce water pressure. If you find a leak, it might be time to call in the pros.
- Examine Pipe Condition: Older homes often have galvanized pipes. These can corrode and restrict water flow. If your pipes look rusty or discolored, that’s a red flag.
- Consider Pipe Size: Sometimes, the issue is with the pipe size. If your pipes are too narrow, they can’t deliver enough water pressure. Upgrading to wider pipes might be necessary.
By testing your pressure and inspecting your pipes, you’re well on your way to solving your low water pressure issues. Plumbing repair tips for low water pressure emphasize the importance of identifying the problem accurately. Only then can you find the right solution.
So, next time you’re dealing with a weak shower or slow-filling tub, don’t panic. Follow these steps to get to the root of the issue. Happy plumbing!
Quick Fixes For Low Water Pressure
Experiencing low water pressure can be frustrating. Fortunately, plumbing repair tips for low water pressure offer simple fixes you can try before calling a plumber. These quick solutions can often restore your water pressure to a satisfactory level.
Clean Aerators
Start by cleaning the aerators on your faucets. Aerators can get clogged with debris and minerals. Unscrew the aerator and soak it in vinegar for a few hours. This will help dissolve the buildup. Rinse and reattach the aerator to see if the water pressure improves.
Check Valves
Next, inspect the water valves in your home. Sometimes, valves aren’t fully open, which can reduce water flow. Plumbing repair tips for low water pressure often suggest checking the main water valve and individual valves to ensure they’re fully open. This simple step can often resolve low water pressure issues.
Advanced Solutions
Having low water pressure can be a real headache. But don’t worry, plumbing repair tips for low water pressure include advanced solutions that are more effective than basic fixes and can make a big difference.
Let’s dive into some of these advanced solutions to improve your water pressure.
Replace Fixtures
Sometimes, the problem is with the fixtures themselves. Over time, fixtures can get clogged or worn out. Replacing old fixtures can give you better water pressure. Here’s a simple step-by-step guide:
- Turn off the water supply: Before you start, make sure to turn off the water supply. This avoids any mess.
- Remove old fixtures: Use a wrench to unscrew the old fixture. Be gentle to avoid damaging the pipes.
- Clean the area: Clean the pipes and surrounding areas. Remove any debris or buildup.
- Install new fixtures: Screw in the new fixture. Make sure it’s tight but not too tight. Over-tightening can cause leaks.
- Turn the water back on: Slowly turn the water back on and check for leaks. If everything looks good, you’re done!
Replacing fixtures is a straightforward way to improve water pressure. Plus, new fixtures can also give your bathroom or kitchen a fresh look.
Install Pressure Regulator
If replacing fixtures doesn’t solve the problem, you might need a pressure regulator. A pressure regulator controls the pressure of water entering your home. Here’s how to install one:
| Step | Description |
|---|---|
| 1 | Turn off the main water supply. |
| 2 | Locate the main water line where it enters your home. |
| 3 | Cut a section of the main water line to fit the pressure regulator. |
| 4 | Attach the pressure regulator to the cut section of the pipe. |
| 5 | Secure the regulator and tighten all connections. |
| 6 | Turn the water back on and adjust the regulator to the desired pressure. |
Installing a pressure regulator can be a game-changer. It ensures consistent water pressure throughout your home. No more weak showers or slow-filling sinks!
Remember, these advanced solutions are a bit more technical. If you’re not comfortable doing them yourself, it’s always a good idea to call a professional plumber. They can help you get the best results without the hassle.
Got any other plumbing problems? Stay tuned for more tips and tricks to keep your home running smoothly!
Maintaining Optimal Pressure
Low water pressure can be a frustrating issue. But with proper maintenance and plumbing repair tips for low water pressure, you can enjoy a consistent flow.
Keeping your water pressure at an optimal level ensures efficient water use and prevents potential damage to your plumbing system. Here are some practical tips to help you maintain optimal water pressure in your home.
Regular Checks
Regular checks are essential. Inspect your plumbing system monthly. Look for leaks, drips, or any unusual signs. Pay attention to faucets, showerheads, and pipes. Check the pressure regulator valve. Ensure it is set correctly. If you notice any problems, address them immediately.
Preventative Measures
Taking preventative measures can save you from major issues. Clean your faucet aerators and showerheads regularly. Mineral buildup can reduce water pressure.
Use vinegar to dissolve any deposits. Install a water softener if your area has hard water. This reduces the buildup of minerals. Check your home’s water pressure. You can use a pressure gauge for this. The ideal pressure should be between 40-60 PSI.
Professional Help
Sometimes, low water pressure issues can be too complex to handle on your own. When you’ve exhausted all DIY options and the problem persists, it’s time to call in the experts. Professional plumbers have the skills and tools needed to diagnose and fix the issue efficiently. But when exactly should you pick up the phone and call a plumber? Let’s dive into that.
When To Call A Plumber
Knowing when to call a plumber can save you a lot of trouble. Here are some signs that professional help is needed:
- Multiple Fixtures are Affected: If low water pressure is affecting more than one faucet or showerhead, it could indicate a deeper issue within your plumbing system.
- Sudden Drop in Pressure: A quick and unexpected decrease in water pressure might be a sign of a burst pipe or a significant blockage.
- Unusual Noises: Hearing strange sounds like banging or gurgling when you turn on the water can be a red flag.
- Visible Leaks: If you notice water pooling or damp spots around your pipes, it’s time to call a professional.
Choosing The Right Service
Finding the right plumber can seem daunting, but it doesn’t have to be. Here are a few tips to help you choose the best service for your needs:
- Check Credentials: Ensure the plumber is licensed and insured. This protects you in case of any mishaps.
- Read Reviews: Look at online reviews and ask for recommendations from friends or family. A good reputation is a strong indicator of quality service.
- Get Multiple Quotes: Don’t settle for the first estimate you receive. Compare prices and services to get the best deal.
- Ask About Experience: Inquire about the plumber’s experience with plumbing repair tips for low water pressure. Experienced plumbers are more likely to resolve your problem efficiently.
Remember, a good plumber isn’t just someone who fixes the problem; they also provide advice on how to prevent future issues. Don’t hesitate to ask questions and learn from their expertise. After all, a stitch in time saves nine!
Diy Vs Professional Repairs
When you’re dealing with low water pressure, the decision between tackling the issue yourself or calling in a professional can be a tough one. Both options have their merits and drawbacks. In this section, we’ll dive into the pros and cons of DIY versus professional plumbing repair tips for low water pressure, and compare the costs involved to help you make an informed choice.
Pros And Cons
DIY Repairs: If you’re a hands-on person, you might be tempted to fix the low water pressure on your own. Here are some advantages and disadvantages to consider:
- Pros:
- Cost savings: You can avoid labor fees by doing it yourself.
- Learning opportunity: You can gain valuable knowledge about your plumbing system.
- Immediate action: You don’t have to wait for a professional to arrive.
- Cons:
- Time-consuming: DIY repairs can take longer, especially if you’re inexperienced.
- Risk of mistakes: Incorrect repairs can lead to more damage and higher costs.
- Limited tools: You might not have the necessary equipment for the job.
Professional Repairs: Hiring a licensed plumber can bring peace of mind. However, it’s important to weigh the benefits and drawbacks.
- Pros:
- Expertise: Professionals have the knowledge and experience to diagnose and fix problems correctly.
- Time-efficient: They can complete repairs faster than a DIY attempt.
- Warranty: Many plumbers offer guarantees on their work, providing extra security.
- Cons:
- Higher cost: Professional services come with a price tag.
- Scheduling: You may need to wait for an available appointment.
Cost Comparison
Understanding the cost differences between DIY and professional repairs is crucial for budgeting. Here’s a quick comparison:
| Repair Type | DIY | Professional |
|---|---|---|
| Basic Toolset | $20 – $50 | N/A |
| Replacement Parts | $10 – $30 | $10 – $30 |
| Labor Cost | Free (Your Time) | $50 – $150 per hour |
As you can see, the DIY route can be much cheaper if you already have some basic tools and are willing to invest your time. However, for more complex issues, professional repairs might be worth the extra cost to ensure the job is done right.
In the end, the choice between DIY and professional repairs comes down to your comfort level, the complexity of the issue, and your budget. If you’re unsure, it might be best to start with a professional assessment to avoid making the problem worse.
Tools And Equipment
Dealing with low water pressure can be frustrating. But with the right tools and equipment, you can fix the issue yourself. This section will guide you through the essential tools and safety tips for plumbing repair tips for low water pressure.
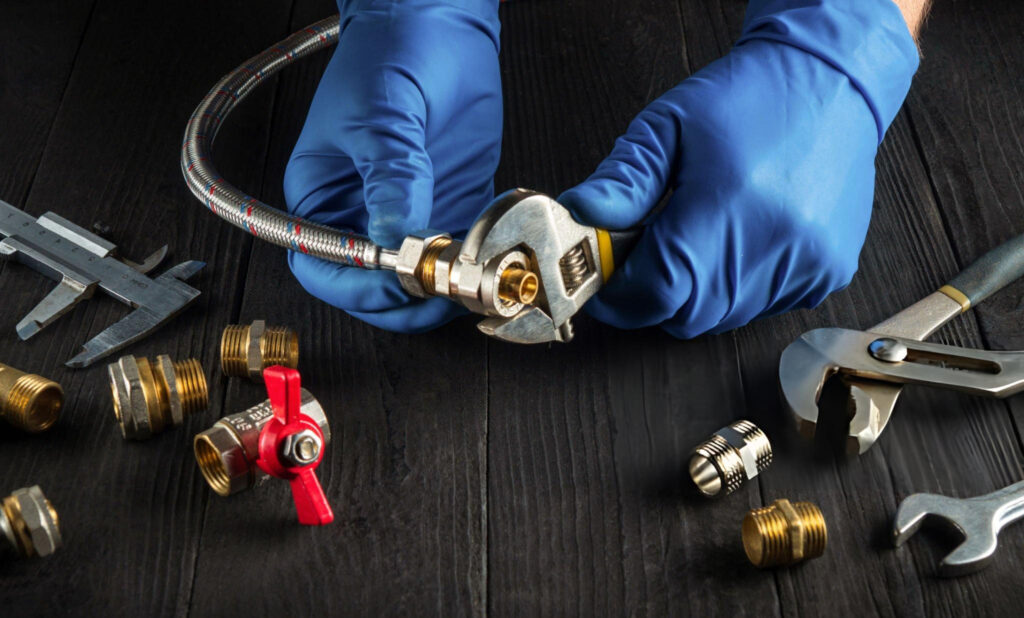
Essential Tools
First, gather the necessary tools. You’ll need a wrench. It’s useful for loosening and tightening fittings. A pipe cutter is essential for cutting pipes to the right length. A pipe wrench helps you grip and turn pipes. Plumber’s tape is crucial to seal the threads. It prevents leaks.
You might also need a screwdriver. It’s handy for removing and securing screws. A plunger is helpful if you encounter clogs. A bucket will catch any water that spills. Finally, have a flashlight. It helps you see in dark areas under sinks or behind toilets.
Safety Tips
Always prioritize safety during repairs. Turn off the water supply. This prevents flooding. Wear gloves to protect your hands. Use goggles to shield your eyes from debris. Ensure the area is well-lit. This helps you see what you’re doing. Keep tools organized. It prevents accidents and saves time.
Check for any electrical outlets nearby. Water and electricity don’t mix. Be cautious. If unsure, consult a professional. Safety first, always.
Frequently Asked Questions
How Do Plumbers Fix Low Water Pressure?
Plumbers fix low water pressure by cleaning clogged pipes, adjusting pressure regulators, repairing leaks, or replacing faulty fixtures.
How To Fix Clogged Pipes With Low Water Pressure?
Use a plunger to clear the clog. Pour a mixture of baking soda and vinegar down the drain. Flush with hot water. Repeat if necessary.
How To Fix Low Well Water Pressure?
Check for clogged pipes or filters. Inspect the pressure switch and adjust if necessary. Ensure the well pump is functioning. Install a pressure booster pump if needed. Consult a professional plumber for persistent issues.
What Is The Most Common Cause Of Low Water Pressure?
The most common cause of low water pressure is clogged pipes. Sediment and mineral buildup restrict water flow.
Conclusion
Low water pressure can be frustrating. Use these tips to fix it easily. Check for leaks, clean faucet aerators, and ensure pipes are clear. Regular maintenance helps prevent issues. Sometimes, calling a professional might be necessary. Don’t ignore low water pressure problems.
Addressing them promptly ensures smooth water flow. Keep your plumbing system in good shape. Enjoy a steady, strong water supply at home.


3 thoughts on “Plumbing Repair Tips for Low Water Pressure: Boost Your Flow Today”
Pingback: How to Fix Plumbing Pipe Corrosion Problems: Expert Solutions – Sweet Home Zone
Pingback: Plumbing Repairs for Blocked Sewer Line: Fast Solutions Today - Sweet Home Zone
Pingback: Affordable DIY Plumbing Fixes for Leaks: Quick and Easy Solutions - Sweet Home Zone